- Make sure you have a backup of the system you are going to edit the partitions on.
- Open Command Prompt as admin
Disabling The Windows Recovery Partition
- We need to disable the existing Windows Recovery Partition to do that run the command
reagentc /disable

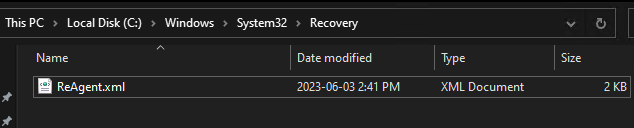
The reagentc /disable command will disable the recovery partition and will move the recovery partition into a file named Winre.wim and will be located in C:\Windows\System32\Recovery (you have to enable showing hidden system files if you want to see it)

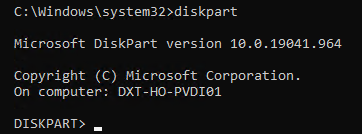
DiskPart
- Run the command
diskpartto launch DiskPart
- List the disks in your system. You can do this by using the command
list disk
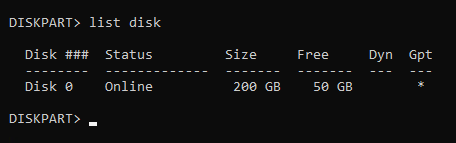
Pro tip from Matt in the comments, if there’s a * in the column for Gpt that means the disk is likely a GPT disk and if there isn’t a * in the Gpt column the disk is likely MBR. Make a note of this as it will be important further down.
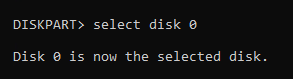
- Select the disk you need to move the recovery partition on. You can do this by using the command
select diskand the disk number. In my setup disk 0 was the correct disk and the command I entered wasselect disk 0.
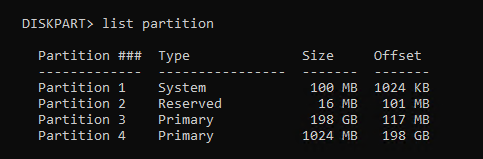
- List the partitions on that disk. You can do this by using the command
list partition
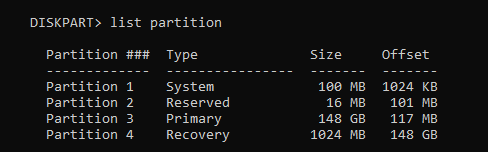
- Select the recovery partition. You can do this by using the command
select partitionand the partition number. In my setup partition 4 is my recovery partition and the command I entered wasselect partition 4

The recovery partition is a protected partition so we need to use a bit more force to delete it.
- Force the deletion of the recovery partition. You can do this by using the command
delete partition override

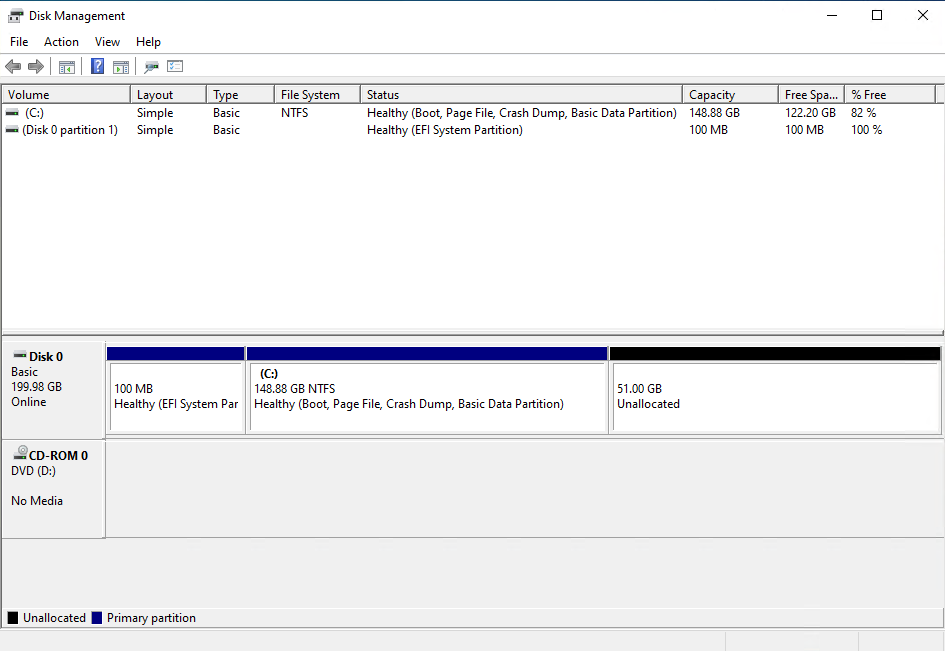
Disk Management
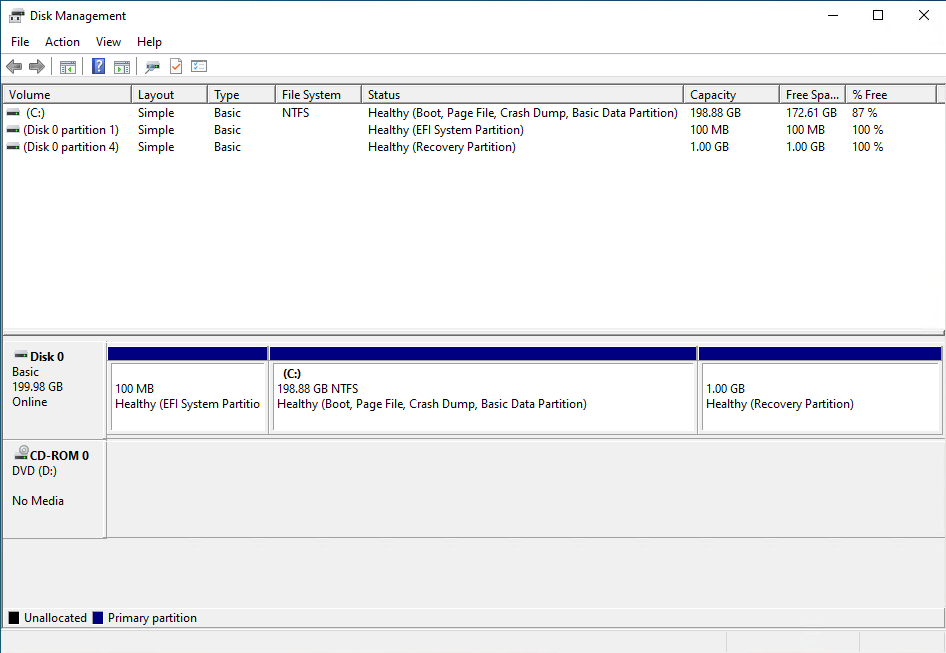
Now if you look in Disk Management you should no longer have the Recovery Partition and it should show up as unallocated.
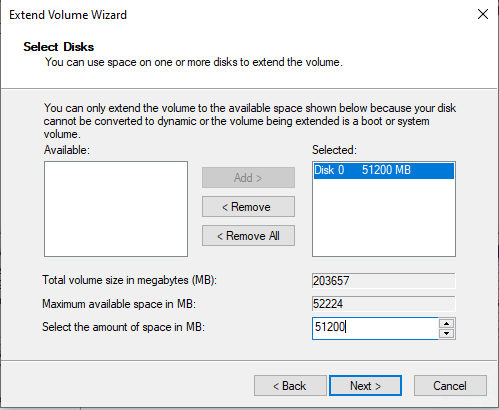
- Expand your disk and leave about 1024 MB off your resized size to leave room for the re-enabling the Recovery Partition.
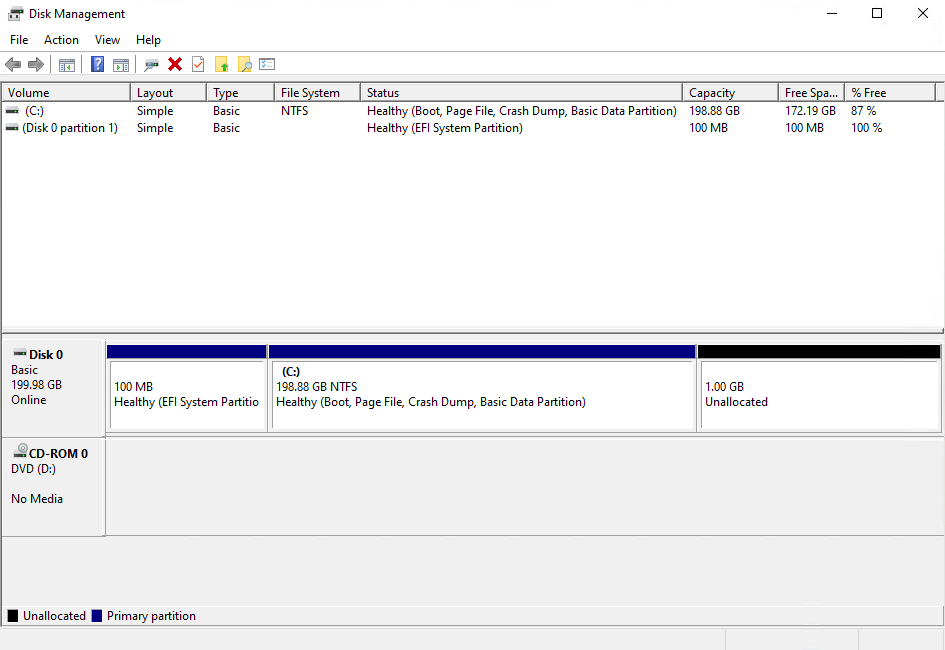
Disk Management should now look something like this.
Once the disk is expanded we need to rebuild everything that is needed for Windows to know that the extra space that we left unallocated can be used to for the recovery partition.
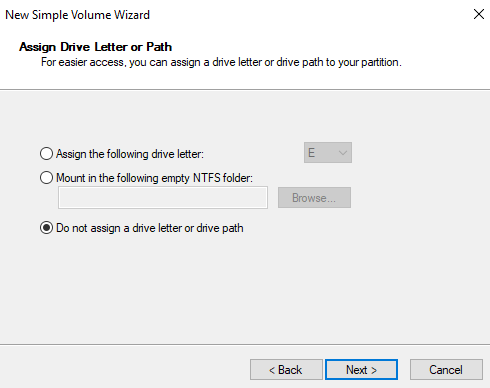
- Create a New Simple Volume with the unallocated space.
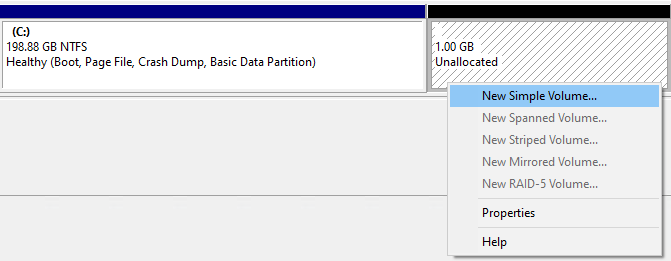
- Don’t give it a drive letter.
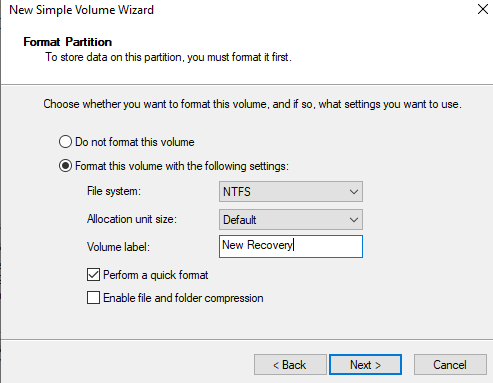
- You can give the new partition a name if you want it does not mater. I’m going to call mine New Recovery.
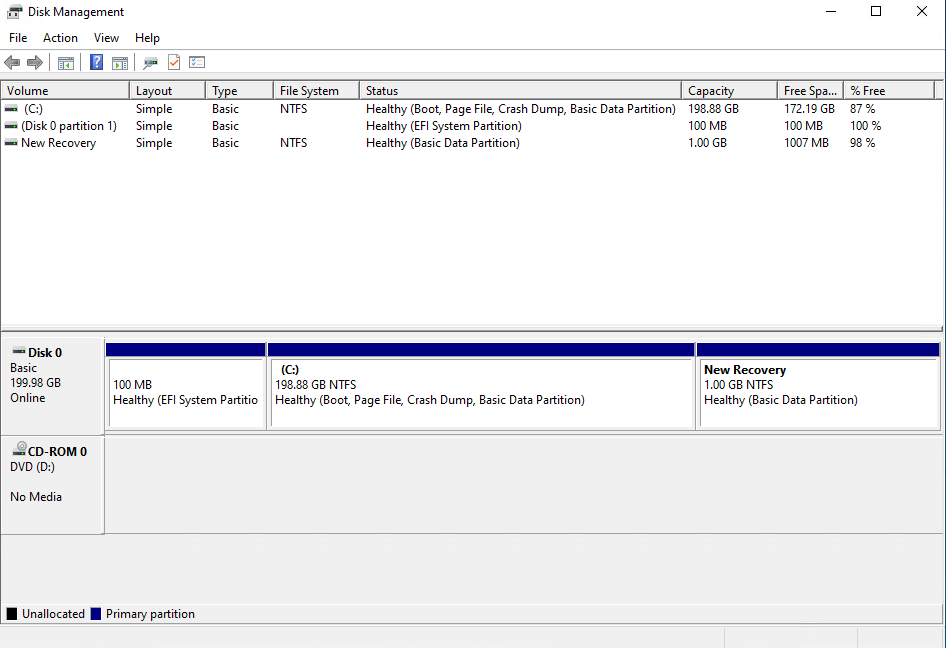
Disk Management should now look something like this.
Back to DiskPart
- In DiskPart list your partitions again by running the command
list partition
- Select the 1024 MB partition with the command
select partitionand the partition number. In my setup it was partition 4 and the command I ran wasselect partition 4
If you have a GPT disk you need to run some very specific command and if you have an MBR disk you need to run different very specific commands.
GPT disk
On GPT disks we need to change the partition ID to de94bba4-06d1-4d40-a16a-bfd50179d6ac which tells Windows that this is a recovery partition
- Run the following command to set the partition as a recovery partition
set id=de94bba4-06d1-4d40-a16a-bfd50179d6ac

We also need to hide the drive and flag it as a required partition to do that we have to set a GPT attribute to 0x8000000000000001
- Run the following command to set the GPT attribute to hide the drive and flag it as required
gpt attributes=0x8000000000000001

- Now we can exist DiskPart.
MBR disk
On MBR disks we need to change partition ID to 27 which will tell Windows that this is a recovery partition.
- Run the following command to set the partition as a recovery partition
set id=27

- Now we can exist DiskPart.
Enabling The Windows Recovery Partition
- Now we can re-enable the recovery partition by running the command
reagentc /enable

The reagentc /enable command will copy the Winre.wim file from C:\Windows\System32\Recovery into our new recovery partition.
If you look at Disk Management again everything shows up correctly.
That’s all there is to it.
Technically speaking we did just delete the Windows Recovery Partition but we did so in a way to keep our existing recovery partition safely intact and then we rebuild the recovery partition and re-enabled it.
I prefer doing it this way as it leaves your recovery options intact and you can do it all live without any reboots.
Source: https://thedxt.ca/2023/06/moving-windows-recovery-partition-correctly/
Microsoft documentation: https://learn.microsoft.com/en-us/windows-hardware/manufacture/desktop/deploy-windows-re?view=windows-11